Culinary Adventures + Preserved Lemons

You know that saying “When life gives you lemons…” ?

Image

Months ago, I had a super amazing dinner with Jonathan (my boyfriend),  at a Moroccan restaurant here in the city.  The appetizer we ordered was something similar to a spanakopita, pretty heavily spiced and containing tiny pieces of preserved lemon. It was divine. So amazing, so tasty, just so good.

Image

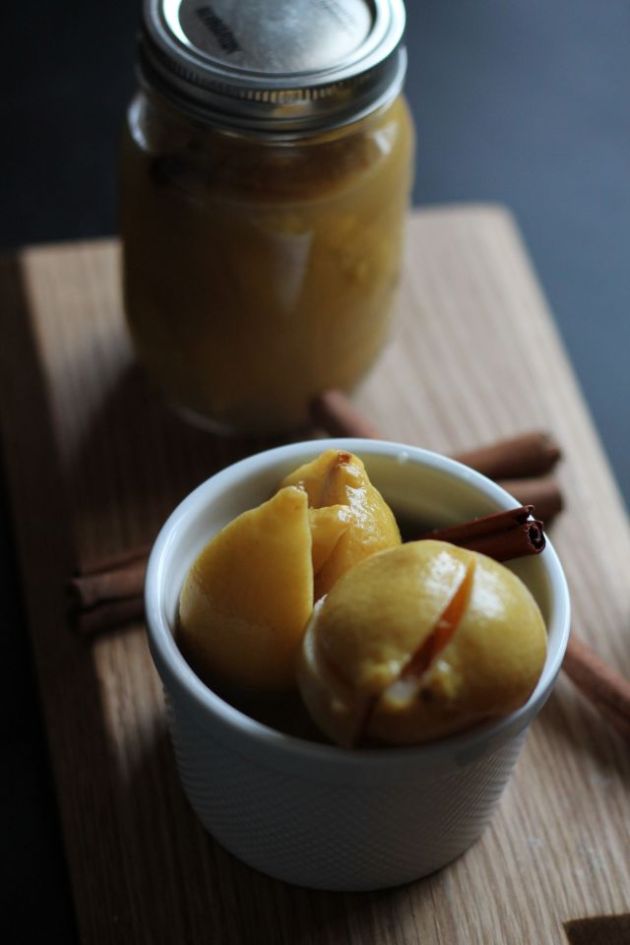
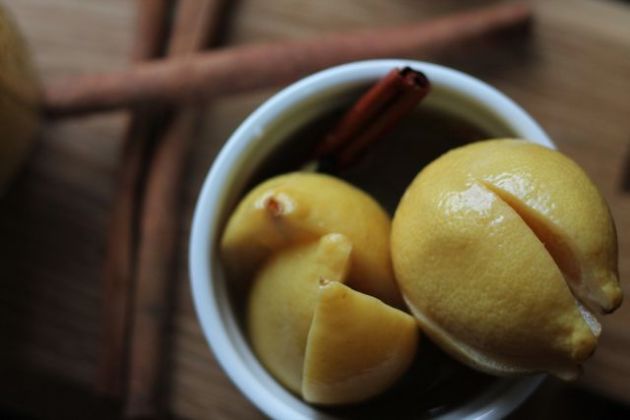
The meal reminded me of a Moroccan themed dinner party I was a part of year(s?) ago. One of the recipes a friend of mine was creating for the meal, involved preserved lemons. She had looked up ways to make them, finding that ultimately there was just not enough time. Preserved lemons need to age, to preserve. The longer they are left, the better – with a minimum of two months before cracking the seal for the first time.  We ended up finding a deli style counter in a Mediterranean shop that sold preserved lemons like a typical North American grocer would sell sliced sandwich meat.

Image

Calgary is home to a plethora of different cultural areas, many many different ethnic grocery stores – resulting in a basic unlimited supply of knowledge surrounding food. The folks working behind the check out counter of the little mom ‘n’ pop shops are so helpful, so willing to give you absolutely every bit of information – whether that be on a specific dish from their country, or about their own personal journey. It’s amazing. If there are small ethnic grocers near you, I strongly urge you to go! The wealth of knowledge is incredible, the people are heart warming – and equally heart warmed by someone of a different culture wanting to learn from them. It’s a beautiful way to spend an afternoon.

Image

Preserved Lemons
two 500mL jars worth

5-7 Lemons
1 Cup High Quality Salt
1 Cup Warm Water
1/2 Cup Lemon Juice
2 Cinnamon Sticks
3-4 Star Anise
8 Peppercorns
Sterilized 500mL Glass Jars

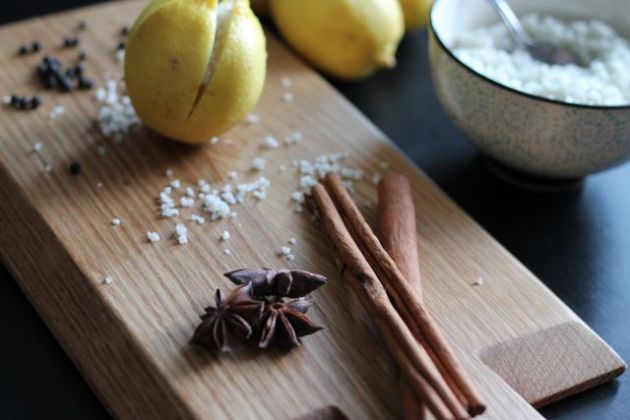
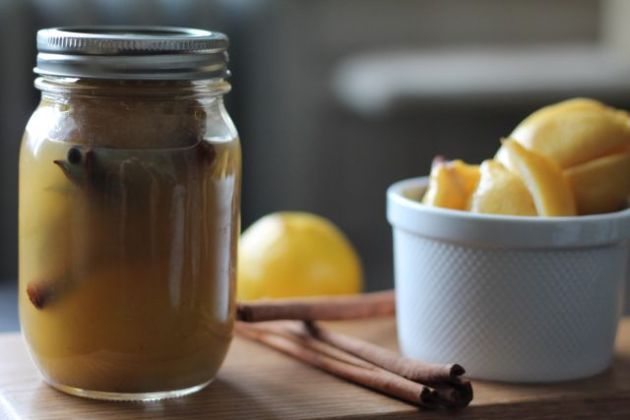
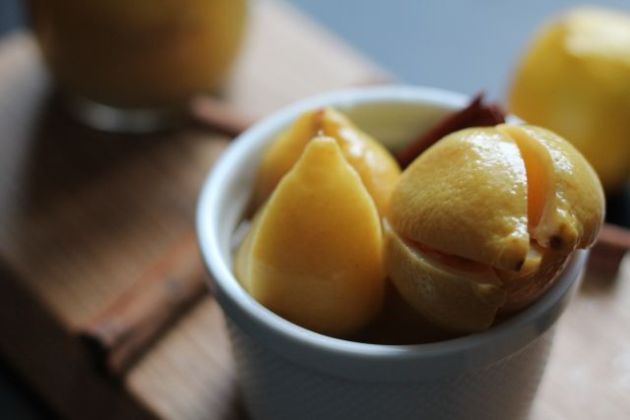
Scrub the lemons, you want them nice and clean because you’ll be eating the rind. Slice the lemon into quarters, keeping the fruit in tact – not cutting the full way to the bottom.  The lemon should still be whole, just sliced open into four parts. Fill the middle of the lemon with salt, then pack it into the bottom of one of the jars. Continue with the rest of the lemons. Add four peppercorns, one cinnamon stick, and at least one star anise to each jar. You should have enough to make two jars, depending on your lemons you may have extra. Using the lemon juice first, add half to each jar, then add in the water, topping up the jar to be filled to the shoulder. Add in another few tablespoons of salt, and seal. Leave in a dark, room temperature place for a minimum of two months. Tip each jar upside down and give it a bit of a whirl every few days to ensure the salt dissolves.

*Preserved lemons are great in a pilaf, mixed into quinoa with veggies (especially good with spinach), couscous – and well, basically any grain dish. They pair well with roasted potatoes, once roasted dress with fresh pepper, oregano and thinly sliced preserved lemon.  Goat cheeses, olive spreads, oh man just use your imagination! So many uses! But keep in mind, they are salty!*
Image

Gratitude, Love, Overwhelming Fondness + Poached Pears

Image

In the past week I have fully submerged myself into the amazing supportive loving community that is B School. I have {already} met some absolutely amazing people and am completely saturated with the most insane amount of joy. I’m so overcome with gratitude and love, the constant display of support is so gorgeous. It’s so inspirational to see, to be a part of, and to have access to. I have been feeling so celebratory and so full of creativity that business ideas are just popping out of me like fireworks! Crazy, colorful, beautiful fireworks.

Of course……  I’m not sure what to do with them yet, so they are here, tucked away in my pretty little note book just waiting for their opportunity to jump out and make dreams come true. That’s what it’s all about for me right now, really, keeping track of all my dreams and paving the way for them to become reality.  Maybe the cement trucks and the handy dandy workers who pave those streets have yet to arrive – but the blueprints, they are being drawn.

Image

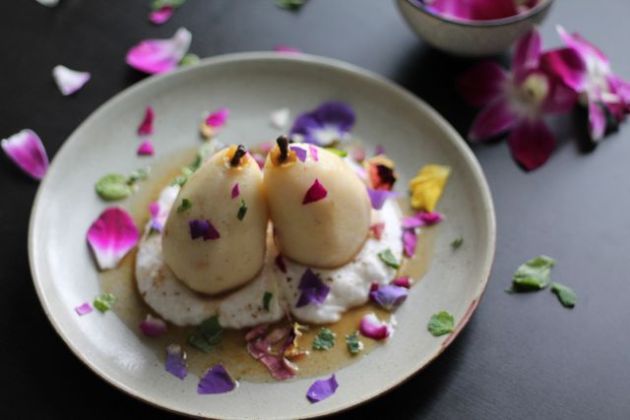
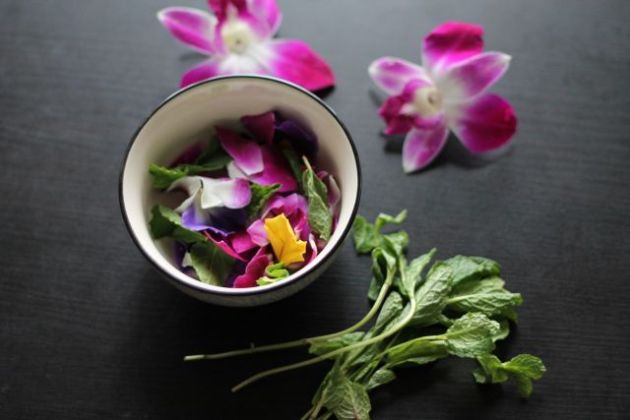
Embracing the time change, the spring ahead (super fantastic time of year), and the giant step I have taken before I’m quite ready… Is cause to celebrate.  I am celebrating with flower petal and mint nature-fetti, sprinkled absolutely everywhere! Mega color therapy, amazing freshness, and completely organic!

Image

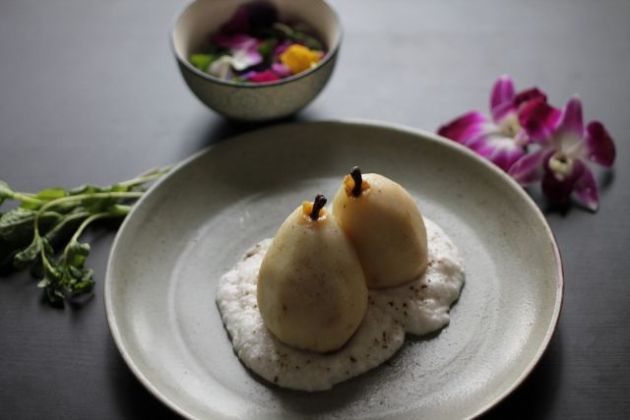
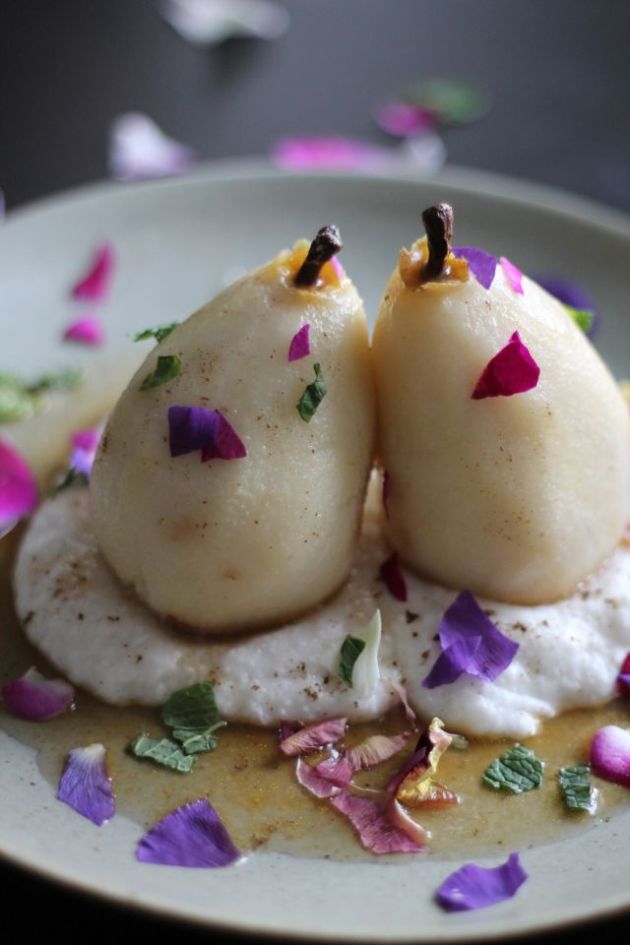
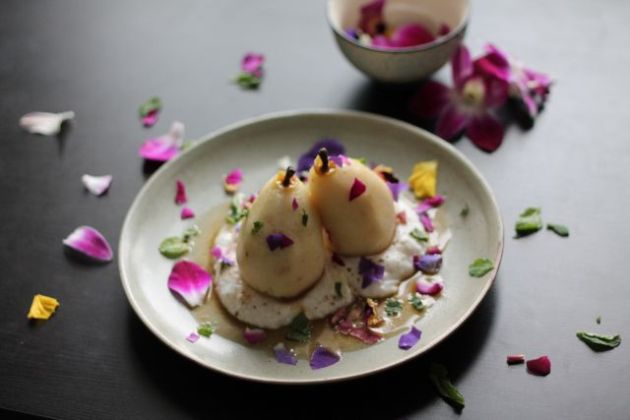
Pears, slightly unripe are left to soften and absorb a beautiful and slightly spicy soaking liquid before topping a thick layer of fresh young coconut cream. Really light, really easy, and so beautiful. The nature-fetti of course is the fun part, having had a quick discussion about kids in the kitchen with a group of fellow B School adventurers it occurred to me – what child doesn’t love throwing confetti? I mean really….  even for adults, get in touch with that inner child and go wild. I sure did.  So, leave the pears spiced and naked then employ tiny hands to help with the decorating! Hello to super fun bonding! Especially come summer, when the flowers can be picked and torn (or left whole!) together in the yard! When I have kids, you can bet your butt my little darlings will have flowery crowns and talk about Earthing. Spreading nature-fetti all over the place.

Image

Poached Pears, Coconut Cream & Nature-fetti
serves 2

2 Unripe Pears
2.5 Cups of Water
4 Tbsp Honey
Finger Sized Knob of Ginger
1/2 Tsp Coconut Oil
1 Tsp Rosehip Powder
1/2 Cup Young Coconut Meat
Pinch of Vanilla Powder
Edible Flowers
Mint

Add 2 cups of the water to a smallish pot, along with the honey. Peel the ginger with the blunt end of a spoon, slice it and pop it in the pot as well. Bring the water up almost to a boil then turn it down to maintain the movement in the mixture. Peel the pears – leaving the stem and bottom in tact, then gently place them on their side in the pot. Turn the heat down to medium-low and rotate with a spoon, gently, every few minutes. After about 10 minutes, remove from the heat completely, add the coconut oil. While that sits, add the coconut meat and the remaining half cup of water to a high speed blender, whirl until it’s thick and creamy. Once the pears have cooled remove them from the pot, placing them somewhere to continue resting until the dish is ready to be assembled. Put the pot of ginger honey pear water back onto the stove, and whisk in the rosehip powder. Reserve for plating. Gather the flowers and the mint together, have fun with it, you may remove each petal & leaf; keep the flowers whole and stem the mint, or rip the petals and the mint into smaller pieces! Store them in a bowl in the fridge until ready to use.

Assembly

Divide half of the coconut cream per pear, scooping it onto one large plate. Arrange the pears on top of the cream, leaning against each other if necessary. Sprinkle with vanilla.  Using a soup spoon or small ladle, surround the pears and cream with some of the reserved soaking + rosehip water. Drizzle the top of each pear gently. Now the nature-fetti! Get creative! Toss, throw, blow out nature-fetti kisses from your hand! Just get those little beauties everywhere!

Image

Slow Roasted Bruschetta, Instant Teleportation!

Image

I teleported myself to Italy this week, as a matter of fact I think I may still be there.  I’m sure somewhere in the distance I can hear the sound of Carlo Buti playing from an old set of speakers. Surely I am seated right now, at this very moment… in some beautiful stone building, gazing out the open window into a courtyard filled with potted plants and herbs, the magical aroma of roasting tomatoes and garlic wafting up and circling me.  While my head spins with the heady scents an elderly couple walks by hand in hand, faintly I can hear two young lovers quarrel somewhere on the next tiny stone street.

Although I have been to Europe, I have never been to Italy.  This though, is how I imagine it.  Big open aches, stone streets that lead one into circle after circle, completely lost but totally at peace. Oh and of course… the smells.

Image

I’ll get there someday, that I am sure of.   For now however – I will turn my tiny kitchen into the Italy of my dreams. Roasting tomatoes, slowly through out the whole day – with garlic, and whatever herbs…  creating magic, pure magic.

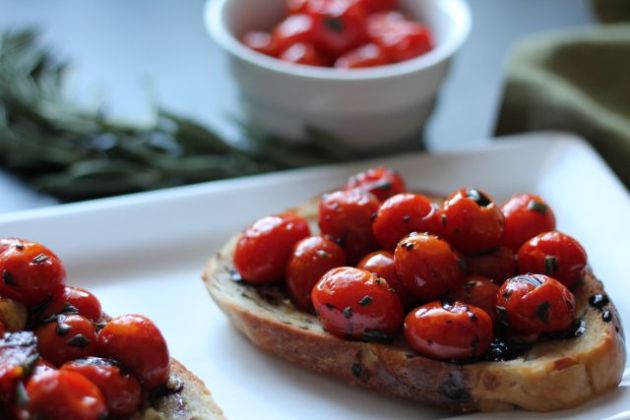
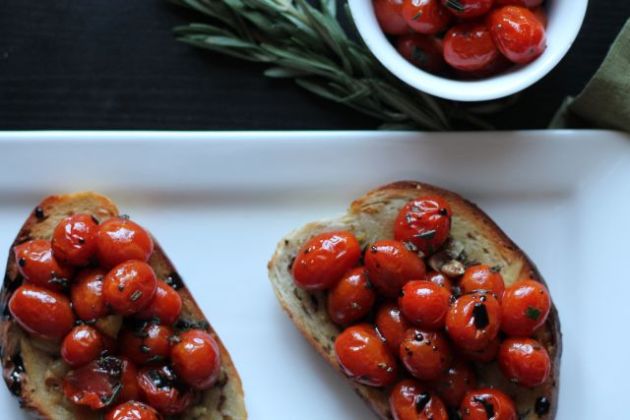
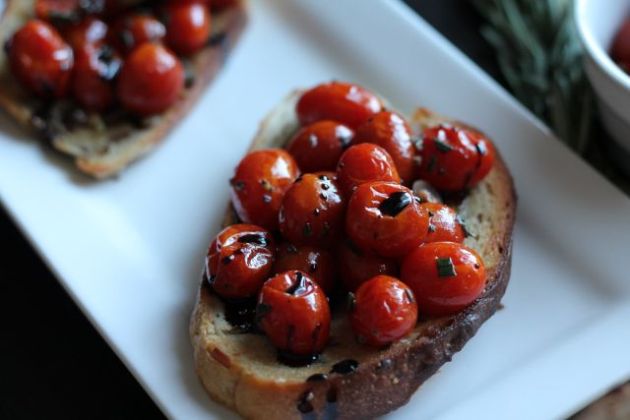
So now that we are all on the same page, how awesome does slow roasted bruschetta sound? Pretty fan-friggin-tastic if you ask me! It’s a bit too cold in my (Calgary) Italy to really be able to enjoy the typical chilled version. Plus, playing on the aromas of roasting.. well, it’s an obvious win to fill the house with such foodie love.  I needed it to be simple, there’s no sense in complicating something that is so full of flavor naturally. Tomatoes, and something a bit different – actually, two things. One, instead of simply rubbing down some (sourdough) bread with raw garlic then toasting it in the oven. I roasted the garlic, a whole head, and spread the gooey amazing delicious cloves all over my toasty slices. Then, instead of the typical basil or oregano, I wanted a bit more punch.  A herb that would withstand a slow roasting. Rosemary. Yep, perrrrfection.

Image

Slow Roasted Bruschetta

3 Cups of Cherry Tomatoes
3 Sprigs of Rosemary
Good Quality Olive Oil
Salt & Pepper
Roasted Garlic
Seedy Organic Sourdough
Balsamic Reduction *Optional but super impressive!

Turn the oven to 300, put about half an inch of water in the bottom of a glass ovenproof dish. Arrange the cherry tomatoes so that as few overlap as possible. Sprinkle with salt and as much fresh ground pepper as desired. Take one of the sprigs of rosemary, holding it at the end where there are less leaves – gently pull down towards the top to separate the leaves from the woody stem. Continue with the other two sprigs. Chop the rosemary and sprinkle half over the tomatoes. Roast like this for an hour and a half to two hours. Checking about half way through to see if there needs a top up slightly on the water. After about an hour and a half, turn the oven up to broil and get those now wrinkly little loves a bit hotter, a very slight browning on the top. Watch to make sure they don’t burn. Remove from the oven and allow to cool. *Very important that it cools, the tomatoes will likely be still in tact, so biting into one would spray super hot fluid all over the mouth*. Once the tomatoes have cooled, transfer them to a bowl and drizzle with olive oil. Add the remaining rosemary.

Assembly

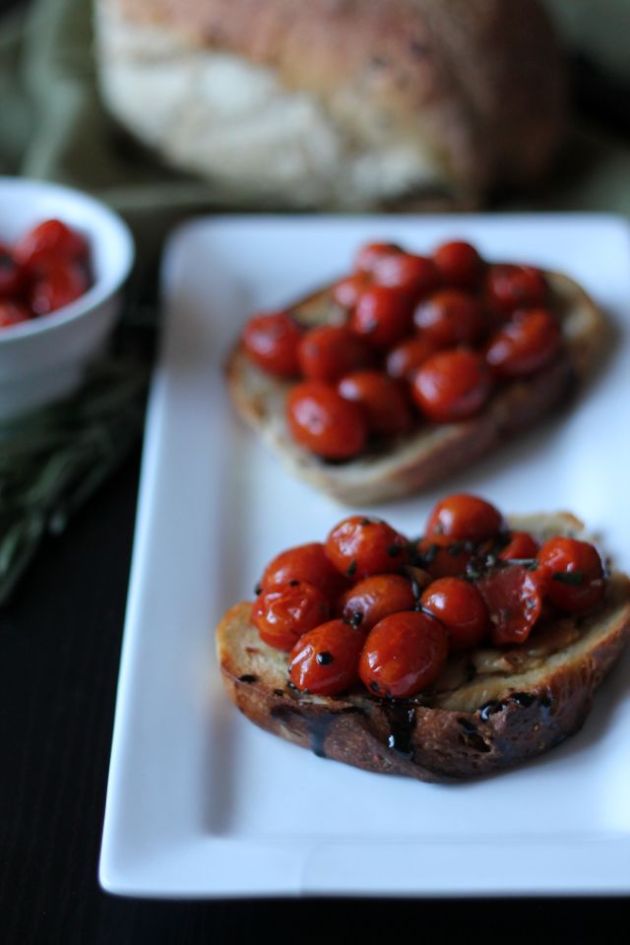
Slice the sourdough and place under the broiler for a few minutes to toast. Rub with a bit of olive oil on the way out, then spread the roasted garlic all over like butter. Top the garlicky slices with the bruschetta and finish with a drizzle of balsamic reduction.

*The balsamic really brings the whole thing together with it’s tangy sweetness, it’s super easy to make – simply add some balsamic vinegar to a pot and bring it up to almost a boil. Get the sides bubbling, soon it will turn a bit thick. Take it away from the heat and allow the balsamic syrup to cool. 

Image

Not Pomme Frites

Image

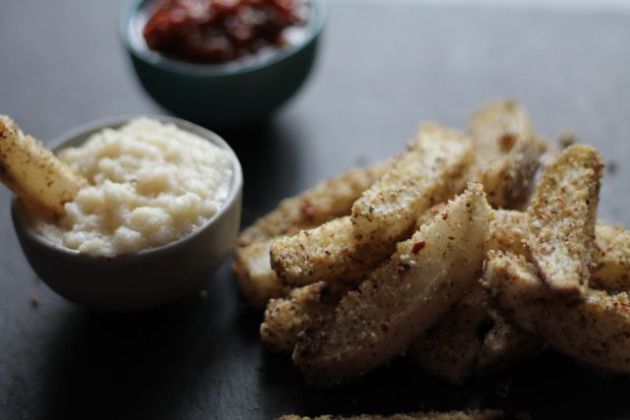
Looks good, right? Yep. Who doesn’t like fries?! Seriously!

When I was a  kid my mom used to make home fries, you know – scrub, slice, oil, salt, oven. Really simple, yummy and best of all, home made. Considering I love potatoes so much, it’s surprising that I rarely make anything in “french fry” form. Probably haven’t for years in fact! Today though, today is different.

Image

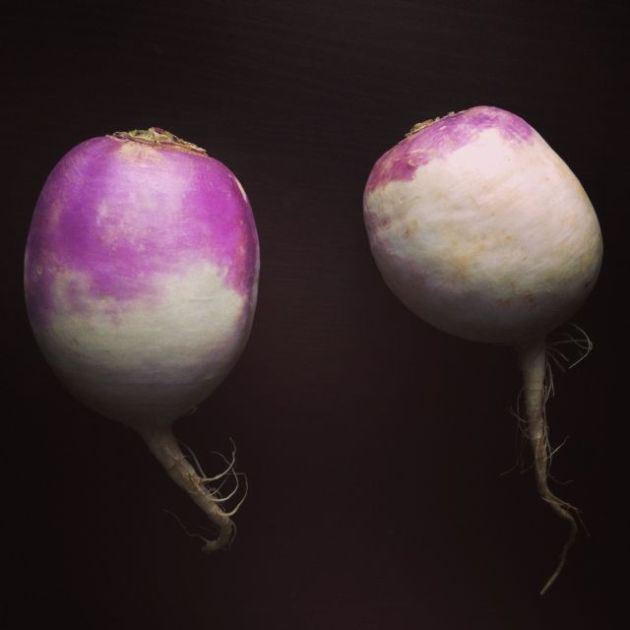
Today, while perusing through the market I popped a pair of beautiful roots in my basket, roots that I pretty much never buy. In fact, I could honestly say I only remember ever buying these lovelies once or twice before. For some reason when shopping for winter produce, I am so drawn to beets and carrots, potatoes (of course). Turnips? Parsnips? Nah…   Maybe because when it is cloudy and grey outside there is just nothing inspiring about eating a white vegetable. Something red! Yellow! Orange! Yes please! But white?
Anyway, as I was saying, today is different.  Inspired by all the pub fare going around in celebration of this years winter Olympics, I decided to make a couple of greener, healthier versions of the typical.  Enter, my two cutsie little turnips.

Image

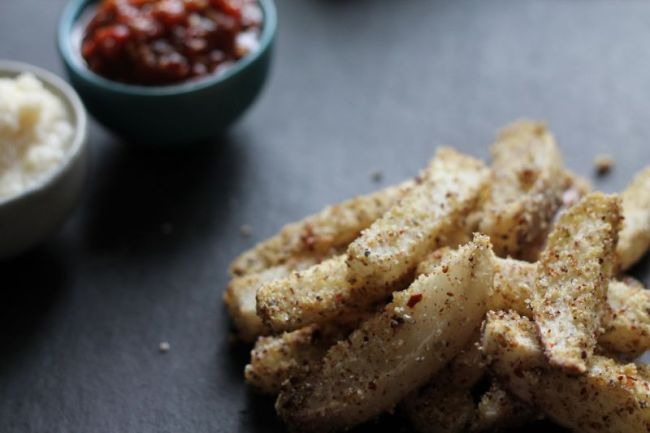
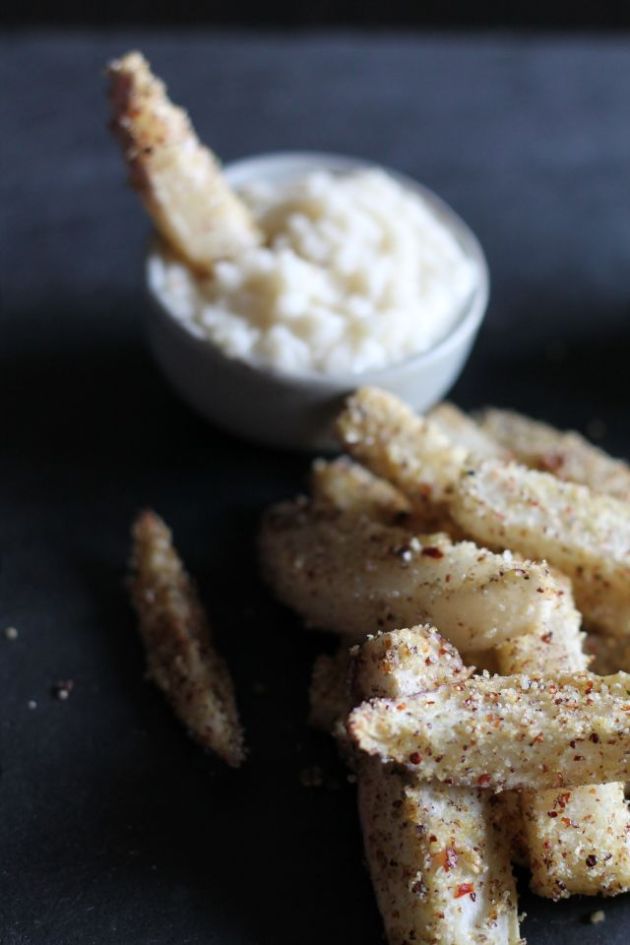
Organic, soft on the inside crispy crunchy on the outside. The perfect french fry, sans potato. Now, I know there are so many different ways to make a fry crispy in the oven. Some people use powdered plant starch, some use flours, butter and a really hot cast iron – I mean there are so many different ways and to me that really factors in to whether or not the end result is “healthy”.  The option I thought best for my frite treat, is quinoa. Raw and/or sprouted, I tried grinding it by hand in my pestle and mortar and ended up with quinoa everywhere. I don’t recommend that for anyone else. Second attempt, I busted out my handy dandy spice grinder and voila. Perfect bits of quinoa, some powdery and fine and some the same texture as course pepper. The best combination for coating fries!

Image

Turnip Frites

2 Small(ish) Turnips
2 Tbsp Tri Coloured Quinoa
1 Tbsp Avocado Oil
Squeeze of Fresh Lemon
Pinch of Salt
Fresh Ground Black Pepper

Preheat the oven to 400, wash the turnips and ready a bowl for mixing. Slice the turnips into whatever size desired, mine were about as long and wide as my ring finger. Add them to the bowl and coat with avocado oil. Using a clean pepper mill or spice grinder, grind about half of the quinoa over the oil coated turnip slices. Sprinkle with salt and a healthy amount of black pepper. Mix well. Continue grinding the quinoa over top until the strips are completely covered, then finish with the lemon juice.  Place on a baking sheet (lined or very lightly oiled) and bake for about 30-40 minutes. The turnip should be soft and still slightly crisp on the inside, with the quinoa coating nice and crunchy on the outside. Serve with homemade ketchup, sambal or whatever condiments you enjoy!

Orange & Lavender Vanilla Bliss

Image

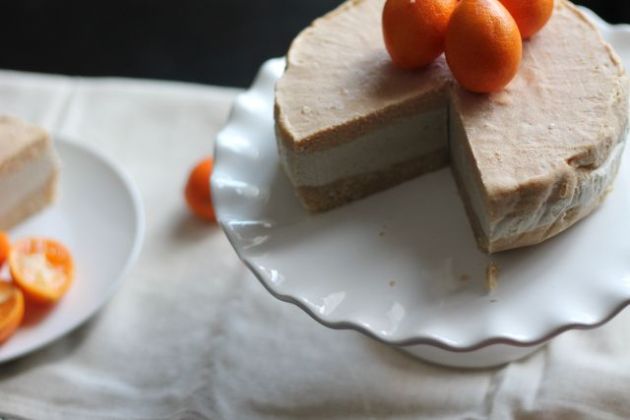
I saw something while grocery shopping recently that made me so excited. Tiny little loves. Kumquats! Incredibly cute, perfect for a pucker. I decided to buy a handful of them (of course), then when I got them home I wasn’t really sure what to do with them. I mean, curd came to mind – some kind of a vegan curd. Maybe not a vegan curd.  They were too cute and would be way too much work to try to juice or smoothie them. Dehydrate, well maybe – but I figured I should at least try to make something with them before I go sucking the moisture out.

Image

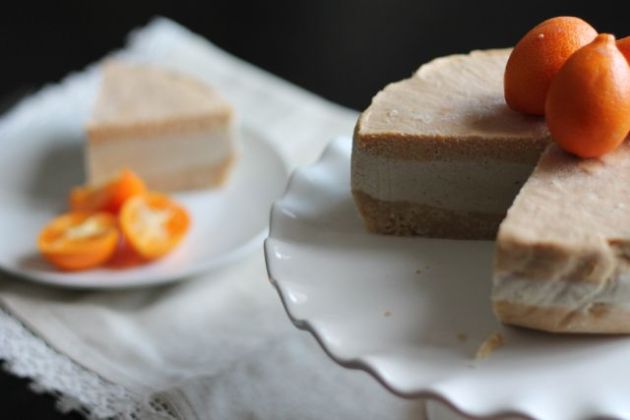
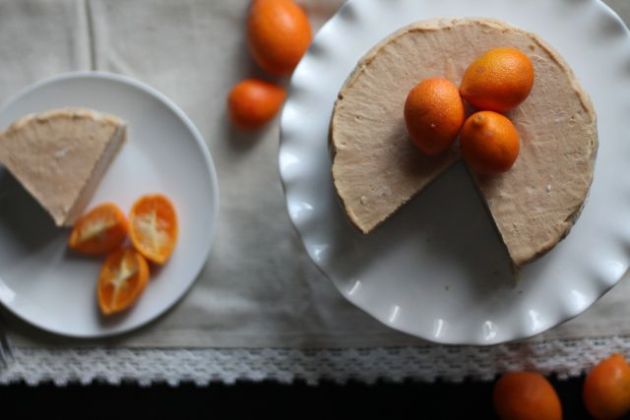
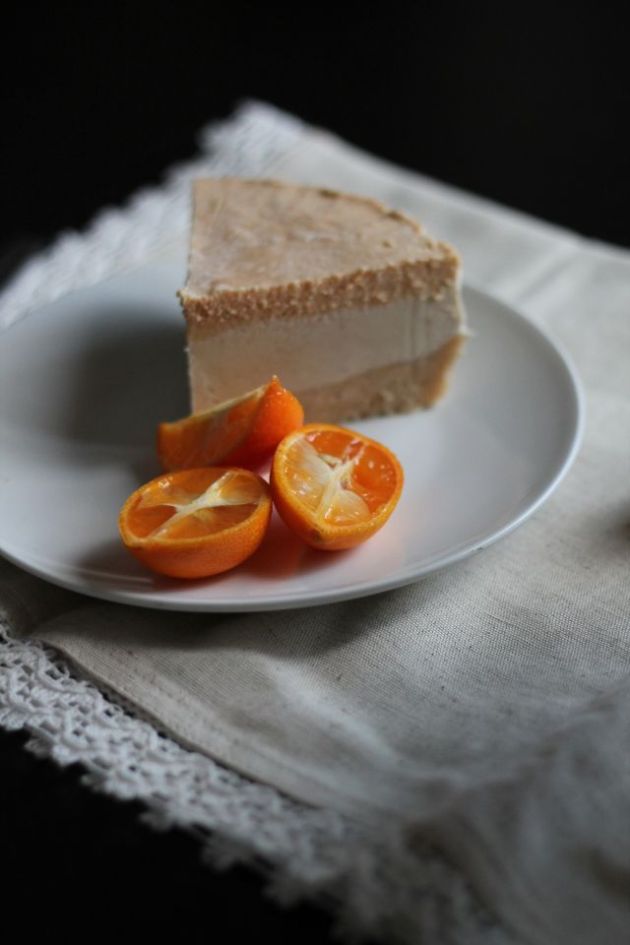
Eventually, many serious puckers later – I decided to zest the heck out of them, and simply mix them with the abundance of other citrus in my fridge.  Citrus that I had been planning to make a little vegan cake with, a raw cheesecake. Creamsicle style.  No big deal, just a layer of smooth and creamy vanilla topped with a punchy orange lavender layer.  No swirling, no extras, just simple summer-style creamsicle flavor. Not that it’s summer… or even anywhere close – but hey.

The subtle floral aroma coming from the lavender really pulls it all together for me, sort of changes the childhood favorite to a more adult, more classy option.  Not that there is anything wrong with amazing orange creaminess on a stick, but there is just something so so satisfying about slicing into a cheesecake. You know?

Image

Orange & Lavender Vanilla Cheese Cake

Crust

1.5 Cups Almond Meal
1/4 Cup Macadamia Nuts – Soaked for 30 minutes
3-4 Tbsp Plant Based Milk of Choice
1/4 Cup Coconut Oil – melted
3 Tbsp Lucuma Powder
Pinch of Dried Vanilla Bean Powder
Pinch of Himalayan Salt

In a blender or food processor, pulverize the soaked macadamia nuts, milk and melted coconut oil until it forms a thick cream. Transfer to a bowl and add the almond meal, lucuma,vanilla and salt. Mix until it forms a dough. Line a spring form cake pan with wax paper, then firmly press the crust mixture down into the bottom. Try to make it as even as possible, place in the fridge to set while preparing the rest of the cake.

Vanilla Layer

1/2 Cup Coconut Cream
2 Vanilla Beans
1/4 Cup Plant Based Milk of Choice
1/2 Cup Coconut Oil – Melted
1/3 Cup Raw Honey
2 Cups Cashews – Soaked for at least 4 hours

Using a sharp knife, slice the vanilla beans in half and gently scrape out the seeds. Place both the scraped seeds and the whole bean to a bowl and cover with coconut cream. Allow the coconut cream to infuse for at least 15 minutes. Meanwhile, in a high speed blender, blend the soaked cashews with the plant based milk, adding the coconut oil once it has cooled and following with the honey. Remove the whole bean pod from the coconut cream, leaving the seeds, then add the coconut to the cashew mixture. Pour over the prepared crust.

Orange & Lavender Layer

1/2 Tbsp Lavender Flowers – Dried
1/2 Cup Coconut Cream
1 Cup Macadamia Nuts – Soaked for 30 minutes
Zest From 1 Large Orange
1 Cup of Fresh Citrus Juice
(I used a combination of kumquat, blood orange and navel)
2-3 Tbsp Raw Honey

Using a pestle and mortar, crush the dried lavender flowers until they are soft. Place them in a bowl with the coconut cream and set aside. Using a high speed blender, blend the macadamia nuts with the orange juice and the honey. Allow the mixture to come together forming a thick cream, then add the coconut and continue blending. Transfer to a bowl and stir in the zest before pouring over the vanilla layer. Place the cake in the freezer for 3 hours, or over night.  If allowing it to set up over night in the freezer, take it out 2-3 hours before serving.

Image

Bring on the Sunshine!

Image

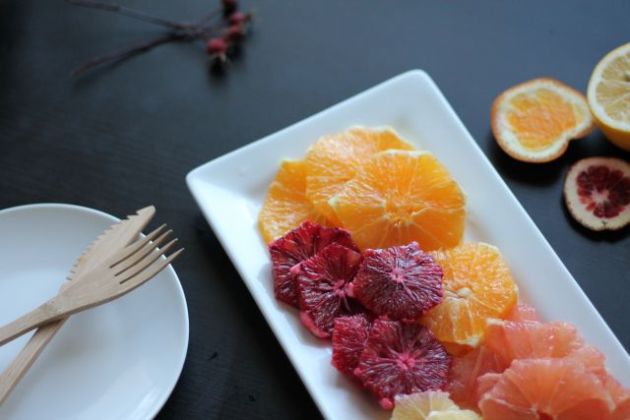
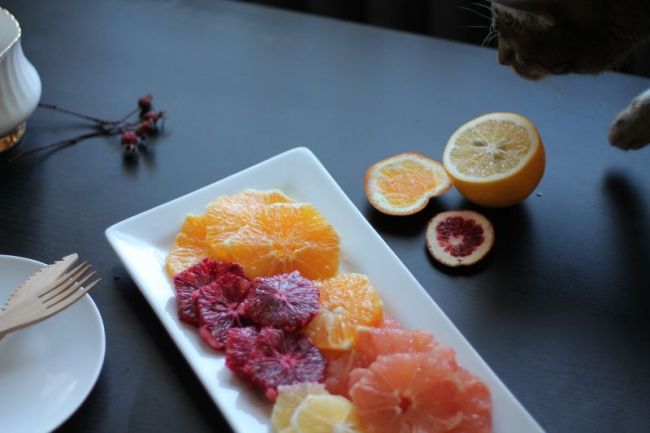
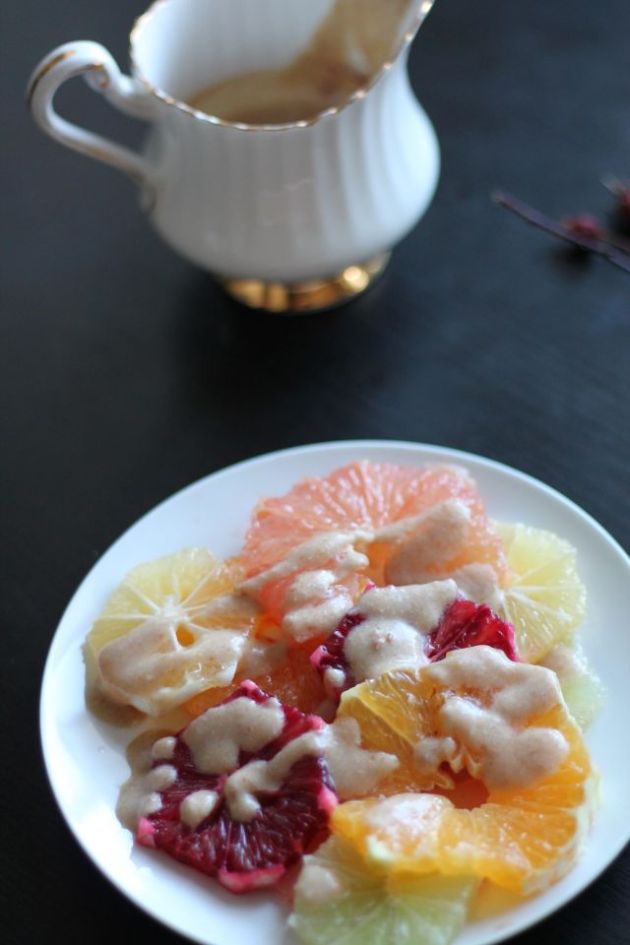
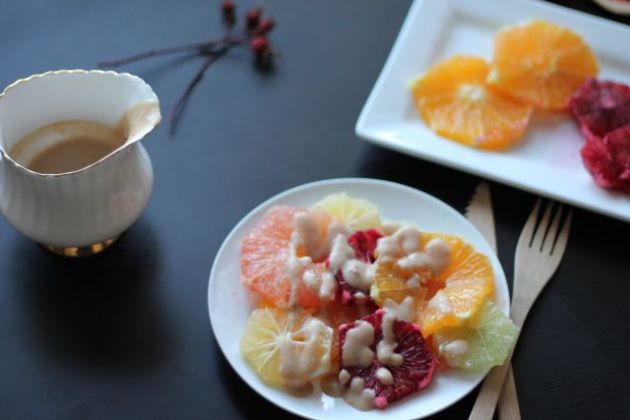
Today marks the last predicted day of our deep freeze (for now..), move over frigid air, get outta here wind chill – sun’s a-comin’ and I can’t wait!  I’m welcoming some not so crazy cold days with a really simple citrus set up. A Sunshine Salad, if you will.  Sweet and tart, with a boosted vitamin C drizzle.  Yum.  Well…. unless you’re my unsuspecting love, biting straight into a drizzle-less lemon. Hehe, oops!

Image

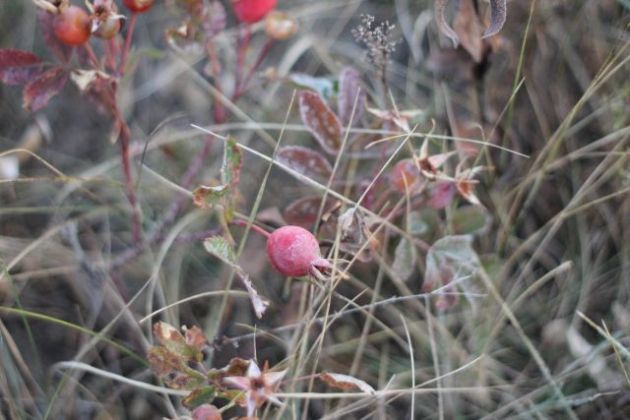
A few months ago, back in the very early grips of winter – I spent the afternoon foraging for enough wild sage to make a number of smudge bundles. During my foraging journey, I happened across hundreds and hundreds of wild roses. Or well, rose hips. The fruit, rose fruit. I know from my upbringing that the best time to harvest rose hips is after the first frost, the zap of ol’ Jack Frost leaves the fruit a touch sweeter. Well, the morning I set out may not have been the first frost, but it was certainly frosty. Perfect.

Image
Wild roses are one of my favorite plants! They are so beautiful, so fragrant, so lifting, I love them. I love walking through the trees just outside the city and happening upon bush after bush. All blooming and full of life, emitting the softest yet strongest aroma and immediately lifting my spirit. I love this plant. I connect with this plant. The wild rose offers much in the way of healing, may it be a vibrational healing or a physical healing. The hips are antibacterial, antispasmatic, mineral rich, and of course the high vitamin C content is always welcome, especially in the cold and dark months of an Albertan winter. Brrr!

Image

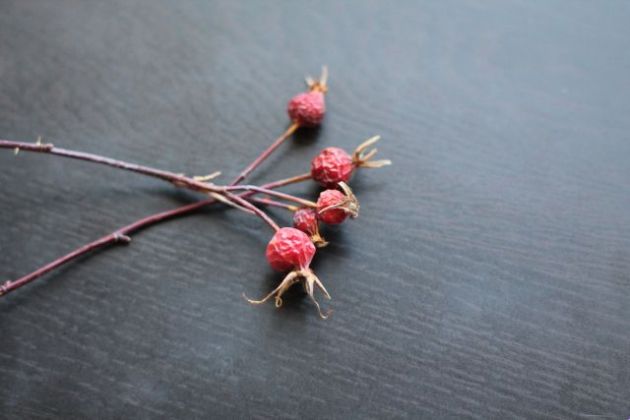
The hips can be dried and ground into a powder, they can be made into jelly, or one of my favorite uses – they can infuse honey or be used to make a rosehip syrup. Rosehip syrup is one of my favorite ways to gently sweeten my home brew kombucha! Buttt….  that’s a different post. Right now, I am talking about ground rosehips, powdery soft and the slightest tinge of orange. Really beautiful and delicate stuff, of course, coming from such a beautiful plant. (Even kitties love them, notice top right!).

Image

We all know and associate citrus with vitamin C, right? Yes, great. Okay. Well now, we can associate rosehips with it as well, loads of it. Pair the two together and people I tell you, you will feel like a super star. A super star shot right out out of this universe and into the next! Seriously simple, super yummy, and healthy to boot. Use whatever citrus is around, kumquats, navel, grapefruit,lemon, pomelo. Any! All! Don’t be scared to add the funny face inducing ones like lemons and limes. The tang is refreshing and the detoxing effects are well worth it. Plus, with a pinch of salt in the drizzle that graces the top of this citrus salad, all different types of fruit get sweeter. Really! Don’t love grapefruit? Try dipping it in salt. Just a touch.  Sounds strange, I know, but it’s a tip I picked up from a teaching kitchen and it works like a charm.

Image

Sunshine Citrus Salad

2 Limes
2 Lemons
1 Large Grapefruit
3 Blood Oranges
3 Navel Oranges
1/2 Cup Coconut Milk
2 Tsp Rosehip Powder
Raw Honey
Pinch of Himalayan Salt

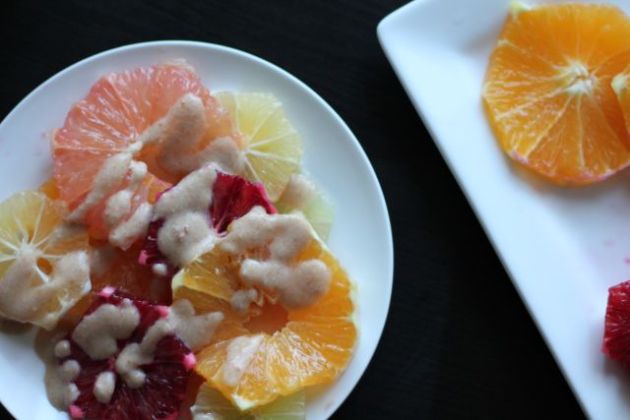
Carefully slice each of the citrus fruits at the top and the bottom, this provides a flat working surface. Begin at the top and slowly remove the rinds (rinds which can be kept and dried, chopped up and used for infusions!). Once the rinds have been removed, slice thinly and arrange on a serving plate. In a small bowl, whisk together the coconut milk, rosehip powder, honey to taste and the pinch of salt. Pour over top of arranged citrus slices and enjoy!

Image

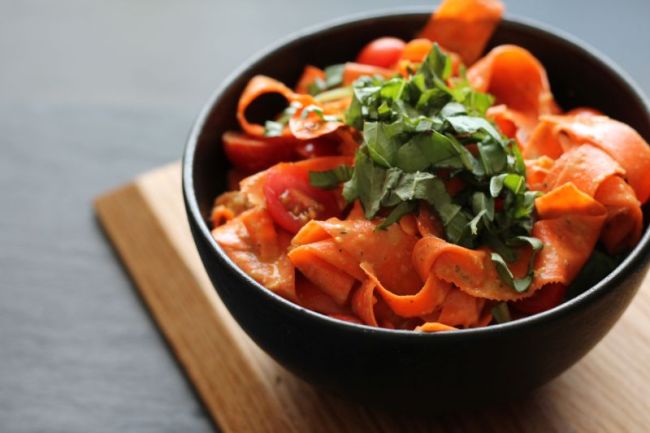
Carrot Pappardelle with a Middle Eastern Twist!

Image

Growing up, I absolutely loved pasta. I loved it! Spaghetti drenched in tomato sauce and covered with melty cheese was one of my favorite meals before school in the morning. When asked what my favorite food was as a kid, my answer would always be pasta. That love transferred over when I started working in restaurants, ordering pastas for my lunch and dinner break.

These days, I still love pasta – but I’m more likely to be found curling up with a bowl of the veggie variety. Not quite as steamy hot and pillowy soft, but it sure doesn’t leave you feeling heavy and bogged down inside!

Image

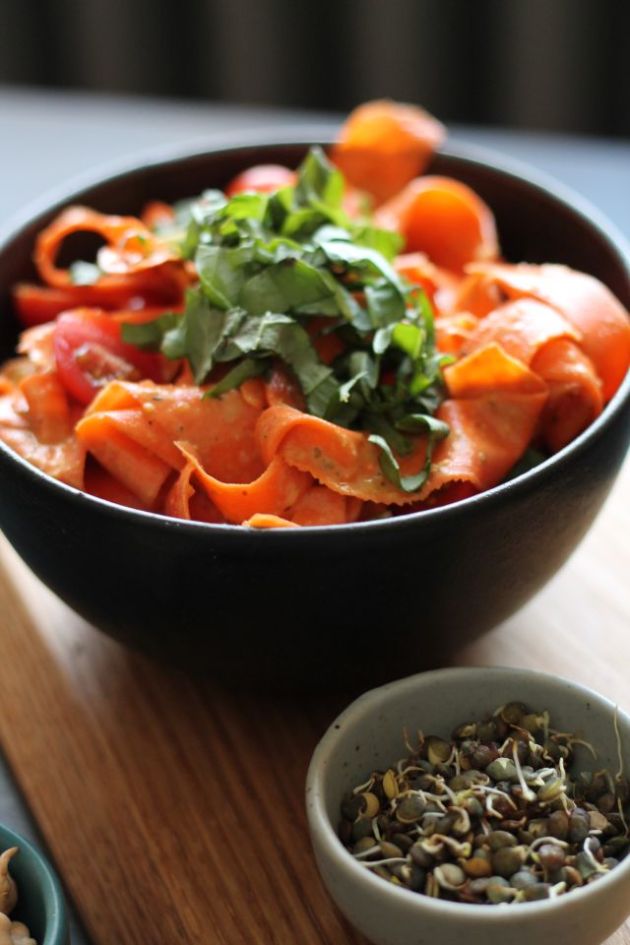
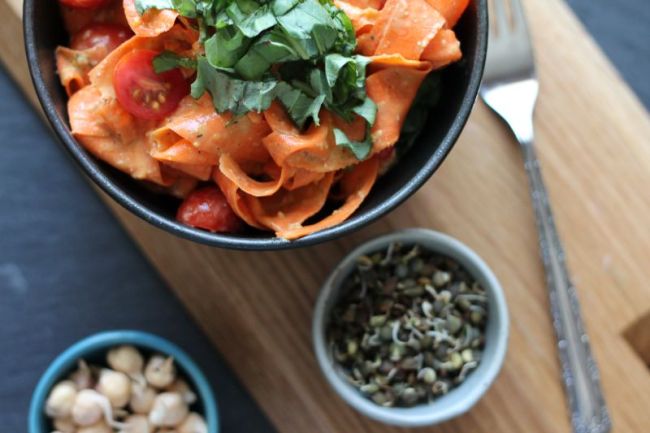
Nope, in fact veggie pasta leaves you feeling satisfied! Perfectly satiated, and with none of that so-full-your-back-hurts kind of finish (thank goodness). The bonus, is that you get all the vitamins and minerals from the raw vegetable and don’t need to worry about your digestive system being confused by the wheat! No sticky gluten, no preservatives or additives, just real goodness.   I have tried a number of different vegetable options for making pasta, I enjoy zucchini for thin noodles; celeriac for thicker noodles, and carrots work so incredibly well for a wide pappardelle type noodle! So easy, so fresh.

Image

When I was a kid, I couldn’t stand carrots.  I was good with things like broccoli, but for some reason I just could not get down with carrots. I had it in my head that I didn’t like them, so I would over-chew them. Weird, right? Yeah, it gets better.  I would over-chew them to the point they would swell, picture it.  Okay, maybe they didn’t swell for real, but that’s exactly what it felt like when I tried to swallow the then massive amount of pulp in my mouth. For years and years I would refuse eating carrots, telling whoever was trying to feed them to me that they would swell in my mouth and cause me to choke.  Now that I am an adult and able to find interesting ways to eat these tapered orange roots, I enjoy them thoroughly! No more insane pulpy mouth swelling for me!

Image

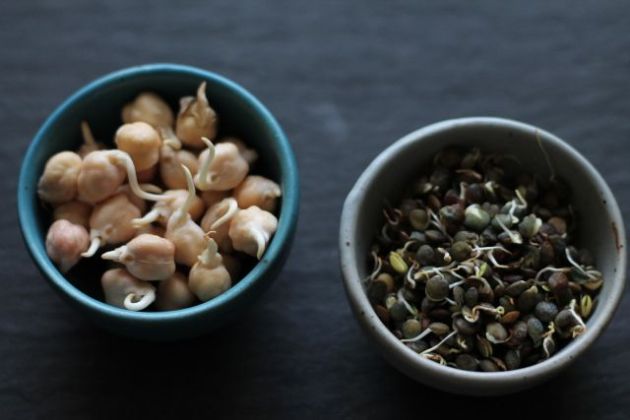
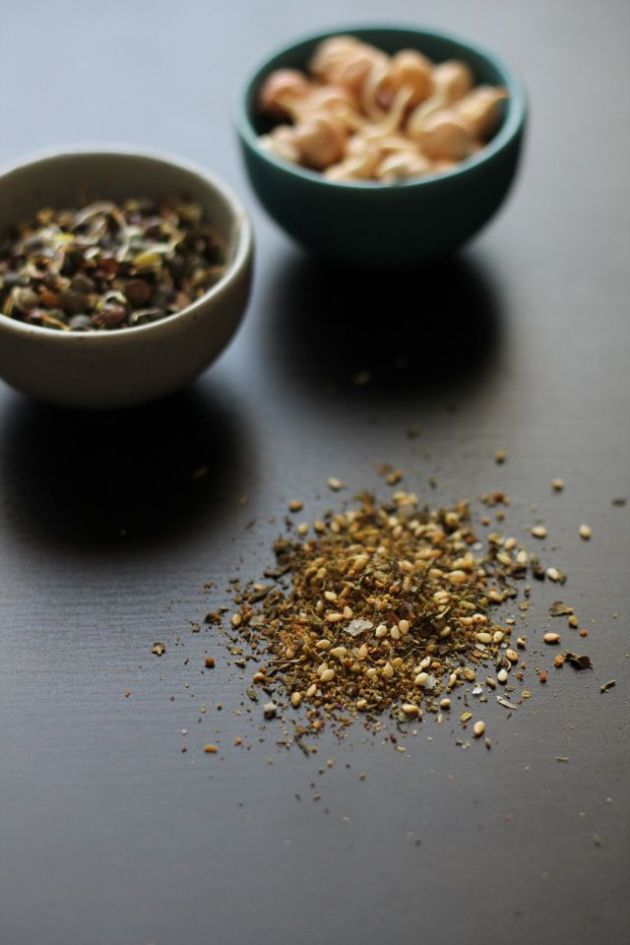
Two power houses that make this carrot pap so filling and energy lifting are sprouted chickpeas & lentils. Sprouts are a fun and suuuper simple way to add the life force into any dish. A true enhancement to a raw bowl, a cooked bowl, or gosh just to grab a handful!

Image

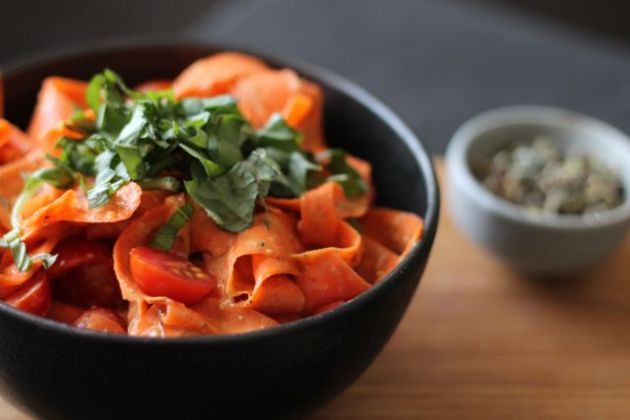
Finally! The secret is in the sauce. Really. It’s sweet, tangy, earthy and has a distinct herby finish. Packed full of anti-inflammatory, anti-viral, anti-everything, digest stimulating, taste bud tingling…   get it? It’s packed full of awesome. Really!  Za’atar is a grouping of different herbs and sesame seeds very commonly used in Middle Eastern cuisine. The biggest flavors in a typical za’atar mix are sumac, thyme, and roasty toasty sesame seeds; other lovely additions may be oregano, basil, citrus peels and sometimes (as seen above) chunky sea salt. The combination is heavenly, both on the nose and the tongue.

Image

Carrot Pappardelle 

5-6 Carrots
1-1.5 Cups Cherry Tomatoes
Handful of Fresh Basil
1/3 Cup Lentil & Chickpea Sprouts
1 Tbsp Sunflower Seed Butter
2 Tbsp Apple Cider Vinegar
1 Tsp Maple Butter (or 2 Tbsp Maple Syrup)
1 Tbsp Warm Water
1 Clove of Garlic
1 Inch Knob of Ginger
1 Turmeric Finger
1 Tsp Za’atar Blend

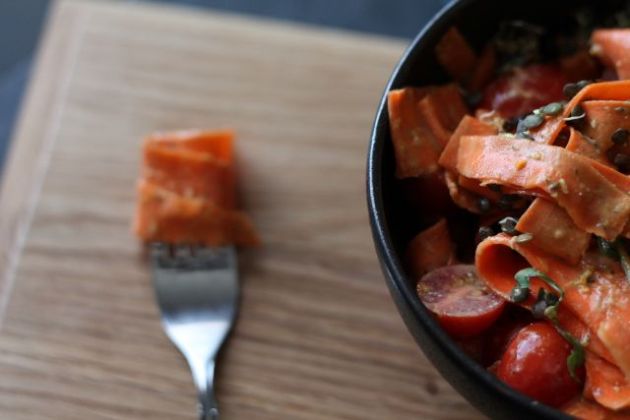
Using a veggie peeler make thin slices of carrot, trying to keep each strip in a long ribbon. Put in a bowl and set aside. In a smaller bowl, mix together the sunflower seed butter, apple cider vinegar, maple butter and water. Stir until combined and smooth. Using a zester or a fine grater, grate the garlic, the ginger and the turmeric over the sauce bowl, stir in the za’atar and mix well. Pour the sauce mixture over the carrots, slice the cherry tomatoes in half and add them to the bowl. Allow the mixture to sit for at least an hour, the flavors will be better the longer they mingle. Shred the basil with a sharp knife or by hand and garnish the top of the dish. Add the chickpea & lentil sprouts before serving.

Image

Noodle Buddha Bowl

Image

Sometimes, for dinner…  the best things are the simplest.  For years I have been making bowls of food and calling them “Buddha Bowls” – in fact one of my very first blog posts was a Buddha Bowl.  Really simple stuff, using what’s in the fridge, or garden, or window sill, whatever is available.

Today was a Buddha Bowl Day, for sure.  I have a fairly busy weekend ahead of me.. that coupled with a lot of fresh veggies in my fridge, and no real desire to cook anything extravagant; well the Buddha Bowl fit perfectly, right into my evening.

Image

This is the time of year everyone seems to be craving something simple, something warm, something with next to no clean-up effort. I can totally agree with all of that, the last thing I want to do is spend the final moments of daylight doing dishes. I am so very much looking forward to longer days!  One thing that I find is often forgotten come mid winter is that our bodies need extra love! I for one crave the crisp freshness of fruits and vegetables so much more when the season offers so much less.  I try to buy smart, I try to purchase mostly what is in season – this week though, when I saw the sweet peas. I couldn’t resist.

Super delicious little crunchy loves that remind me of summer, that immediately transport me to a warm and sunny day in the grass.  I think that being shot off to a different time was just as important for my inner-self as eating the little loves was for my physical body. Just a little winter break, that’s all I needed.  Well..  that and a steaming hot bowl of buckwheat noodles, covered in veggies and doused in a cashew satay sauce.

Image

Soba Noodle Buddha Bowl
serves two

Handful of Buckwheat Noodles
1 Large Carrot
2 Large Portabello Mushrooms
3 Rainbow Chard Leaves
Handful of Peas
1 Large Broccoli Crown
1/4 Cup Raw Cashew Pieces
Creamy Cashew Satay Sauce

Grate the carrot, chop the chard into long strips, cut the broccoli into florets and slice the mushroom length wise into medium-thin strips. Place the portabellos into a pan with a few tablespoons of water. Cook until they are soft, adding more water as needed. Bring a medium sized pot of water to a boil and add the buckwheat noodles, cook until tender. Remove the noodles with a pair of tongs, placing them into a colander and rinsing with cold water. Quickly add the peas and the broccoli to the boiling water – leave them there for no longer than a minute, removing them with the tongs and adding them to the colander to drain.  Reserve 1 cup of the boiling water for the satay sauce.

Cashew Satay Sauce

1 Cup of Boiling Water
2.5 Tablespoons Cashew Butter
2 Teaspoons Apple Cider Vinegar
1/2 Teaspoon Umeboshi Paste
1 Thai Chili
1 Teaspoon Grated Ginger

Suuuuper simple…. Add all ingredients into a jar and shake until combined.

Assembly

Lay the strips of chard on the bottom of each bowl, top with noodles, mushrooms, broccoli and peas. Slowly pour the satay sauce along the side of the bowl, filling the bottom. This will help soften the chard. Top with grated carrot and raw cashew pieces.

Image

It’s a Celebration!

Image

It’s been a long time coming…. this celebration.

I had been planning to write a food blog for a while, didn’t really know how… figured it would be super complicated…  I’m not at all tech savvy, so basically I put it off because I was afraid of it. I had been creating recipes, taking pictures, saving files – you name it. I was doing it. Then, in an emotional tantrum I accidentally deleted everything I had been saving up. Absolutely all of it. From that day, it took me another four months to even consider starting up this blog. I suppose, maybe I had taken it as a sign from the universe that I just wasn’t ready to write (yes, sometimes I am unreasonably emotional).

Image

So finally, I did it.  I told myself that I would not register a domain until I had had the blog for a full year, and had made more than five or six posts.  It’s not that I typically give up on projects, it’s just this one had given me some grief and I was starting it up in a personally vulnerable time.  In reality, it ended up being the outlet that I needed to get myself up and at ‘er and I have since clearly made more than five or six posts.   In fact, in this first year (and a bit) I have filled a bound journal with double sided pages of hand written recipes, some successes and some flops.  I have begun a photography certification course, originally starting because I wanted to learn how to photograph food of course; a certification that has now blossomed into a whole secondary passion. Another wonderful creative outlet that makes me so happy, and is so rewarding.

Image

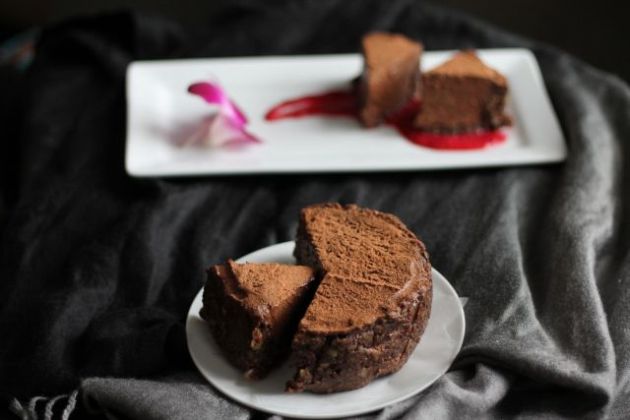
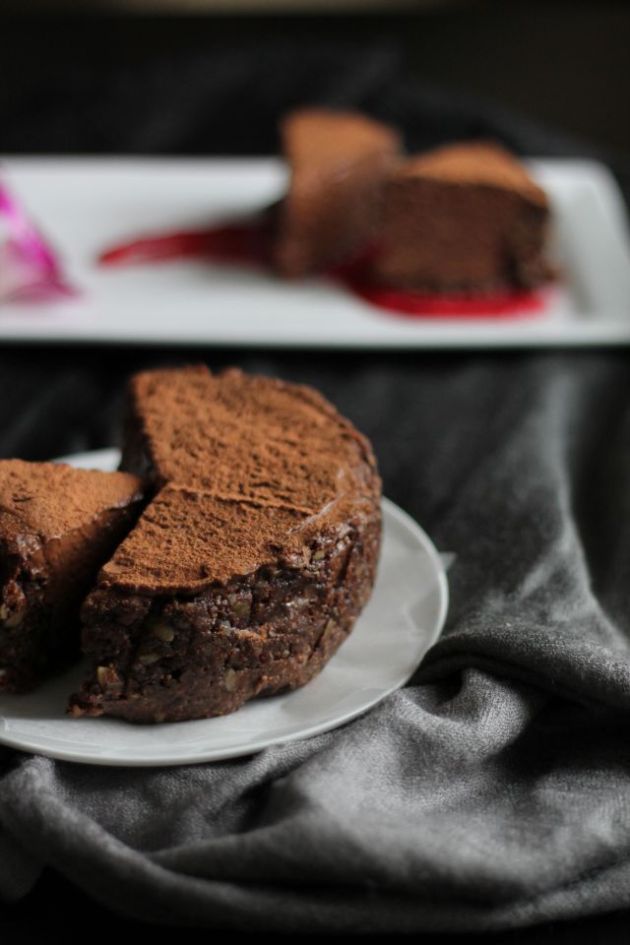
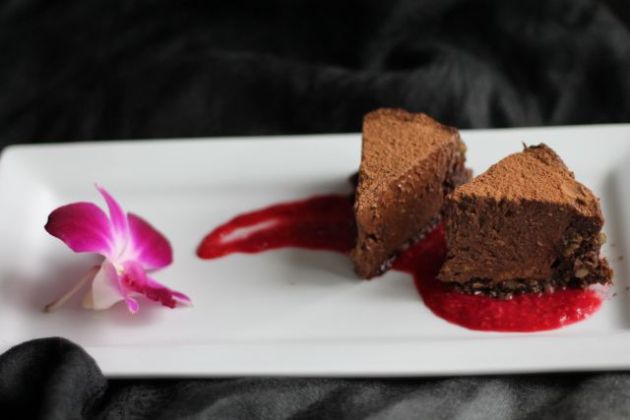
Starting this blog has made me realize so many things about myself. It has been freeing personally, and has helped me grow exponentially. Having a creative outlet is one of the best things we can do for ourselves, seriously. The first year anniversary of my blog was in September, this celebration as I said – has been a long time coming.  Finally this morning I have made good on that promise and have purchased my domain. Woo! Hooray! Yippeee! http://www.sproutinganoldsoul.com exists! In celebration, I paired together ingredients from some of my older dessert recipes (Avo Cacao Pudding & Banana Chocolate Tarts) and created a *nut free* raw chocolate mousse cake.

Chocolate Mousse Cake

Crust

1 Cup Dried Black Mission Figs
3/4 Cup Pumpkin Seeds
3 Tbsp Cacao Nibs
Pinch of Himalayan Salt
6 Tbsp Water

Mousse

3 Ripe Avocados
1 Ripe Banana
2 Heaping Tbsp Raw Honey
1/2 Cup Cacao Powder

Plating

1/3 Cup Raspberries (fresh or frozen)
Splash of Water
Cacao Powder for Dusting

Soak the figs in warm water until they are squishy. Add the figs, pumpkin seeds, cacao nibs, and salt to a food processor – start with two tablespoons of water. Give the crust a whirl. Continue adding one tablespoon of water at a time while the food processor is running until the crust forms a thick paste. Six teaspoons may not be required depending on the moisture in the figs, but six was how many it took for me. Start with less, you don’t want the crust to be too squishy! Line a small-medium spring-form cake pan with wax paper. Push the figgy crust into the pan or shape into small tart shells by hand, then place it in the freezer to set.

To make the mousse, simply add all ingredients into a fresh food processor and whirl until there are no chunks of avocado or banana and a thick mousse has formed. Gently scoop it into the crust, cover, and let it set up in the freezer overnight or for at least six hours. This will ensure the mousse will be able to slice.

Depending on the temperature indoors, remove the cake from the fridge 1 to 2 hours before serving. Blend the raspberries with a touch of water and spread on a plate to be used as a garnish under the cake, or use as a drizzle over top. Sprinkle the top of the cake with the extra cacao powder and slice it into pieces.

Voila!

Simple Restorative Eats

Image

For the last week I have been doing a fairly intensive cleanse, new year, new start. Right?  Cleansing is a very personal thing, some people like it and do it – some people don’t.  A girlfriend at work and myself have been successfully cleansing and fasting for a number of days now… by that I mean it feels like ten. Ridding our bodies of the old and helping to boost rejuvenation.   The cleansing battle has been a bit up and down for me, considering I have a slight food obsession and this particular program includes a five days of no solids. How does a food blogger… quit food? Quit juicing.  Quit…. it all.  It’s been an adventure, lets say that.  

Before beginning the cleanse I spent a lot of time brainstorming how to properly use up the remaining items in my fridge and how to break the fast in a way that would be satiating as well as gentle. The recommended options stated in the cleanse are an apple for breakfast, a salad for lunch and if that goes well – another salad at dinner.    Well that’s all good, fine, quite tolerable.  However, for someone like me who eats an abundance of fermented foods, I have noticed a dramatic change in my inner self with not having any added happy friendly bacteria.

Image

So I have decided to rebel.  I am not going to break the fast with salads, an apple – sure, a green juice instead of a salad and a niiiccee warm bowl of miso soup.  I don’t love soy, honestly I don’t even like soy. I generally try to avoid it, with the occasional exception of some tempeh and a tub of miso paste that calls the top shelf of my refrigerator home.  There are so many debates about soy, so many.  For a very informative and objective look at some of the debates head on over to the Holy Kale, take a read. Decide for yourself if you want to use it and include it.   Like I said, I have a whole shwack load of friendly ferments in my daily life – so miso works for me on occasion.   Occasions… such as this, where I would really like to gently reintroduce semi solids and send my digestive system back into orbit with some fermenty friends.  The thing to remember when making miso, is that in order to get the full benefit of those bacteria it needs to be warm not hot. Scalding those little loves will do no good, so be careful when mixing it up!

Image

Can’t have miso soup… without just a few little steamed gyoza. Right? So easy once you get the hang of it, knowing that after a bowl of miso I would be dying for at least a couple… I made a batch of 20 and froze them. I have a previous post about making gyoza so I won’t delve deeply into my love for little steamed pockets. Maybe the fact that I am doing a second dumpling ish post says enough! These ones are just mushroom, no tempeh or kale. 

Image

I chose to steam the gyoza, limit the frying and why bother with the baking.  Simple is best, plus I love cooking with water and steam.  This cleanse taught me an incredible amount of just how gentle the system is, while being so strong and resilient at the same time. It’s amazing! Truly a wonder.  My own body has gone on a round about ride up and down between feeling good and feeling like crap, I will be happy to have some real food again. That’s for sure.  Steam, because it’s simple and it’s healthy. No added oils or splatter burns.  Just some quick cooking love.

Image

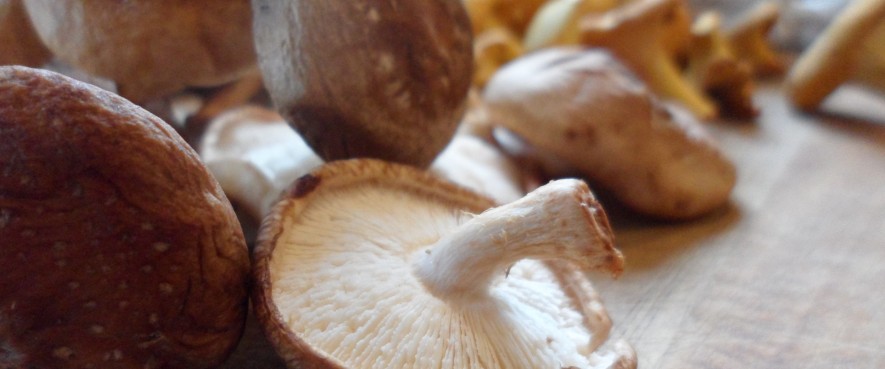
Although I have a burning love for shiitakes on a regular day, I chose to use only these little delights for my come back soup.  Shiitakes support healthy stomach function, are incredibly restorative and are great immune regulators.  Medicinal mushrooms, gotta love ’em! They also look beautiful and ever so traditional in a simple miso broth.  Floating perfectly in place of small pressed tofu cubes!

Shiitake Miso
(makes two bowls)

2.5 Cups of Water
1 Handful of Shiitake Mushrooms
2 Green Onions
1 Tsp Tamari
1.5-2 Tbsp Shiro Miso Paste
Sea Veg & Pea Shoots 

In a medium sized pot, boil the water and the mushrooms. Cook at medium heat for about 5-8 minutes with the lid on. Slice and add the green onion continuing to cook for a minute or so before turning the burner off and adding the tamari. Remove the pot from the stove completely, then scoop out about 2/3 of the mushroom water (liquid only) leaving the lid off and allowing it to cool down slightly, putting it in a soup bowl. Stir the miso paste in the 2/3 of mushroom water until it’s fully dissolved. Once the pot is no longer steaming visibly, add the miso water into the pot and give it a good stir.  Top with nori or other sea veg and some fresh pea shoots.

Mushroom Gyoza 
(makes about twenty)

1/3 Cup Water
2 Cups of Oyster Mushrooms
1 Cup of Shiitake Mushrooms
0.5-2 Tsp Fresh Grated Ginger
1 Green Onion
1 Tbsp Tamari
Splash of Rice Vinegar
Salt & Pepper 
Wonton Wraps

In a large pan or wok, cook the mushrooms in the water until the mushrooms are soft and the liquid has disappeared. Allow the mixture to cool, and then blend in a food processor until it forms a paste like texture. Add the ginger – to taste, sliced green onion, tamari, rice vinegar, salt and pepper. Blend it again to make sure it’s fully mixed. Scoop out half a teaspoon to a teaspoon of filling into the middle of a wrapper, wet the edges and fold! Easy peasy, I promise, once you do a couple you’ll fly through it.  For a more detailed explanation of wrappers and folding check out my previous gyoza post.

Dipping Sauce

2 Parts Rice Vinegar
1 Part Sesame Oil
As many heaps of chili flakes as desired

Image